My distributor is one that has a different right points screw location, and I am not able to adjust the air gap between the Ignitor and the Magnet Sleeve correctly. Even with the Ignitor adjusted "out" as far as its slot will allow, I cannot get any gap, and the Sleeve contacts the Ignitor. A call to Pertronix (I spoke with "Bill" on 19-Jul-00) confirms that they have had a design change for the Ignitor's base plate, that moves the fixed tit "inward" a bit, which allows the slot to be able to adjust correctly. They offered to swap the unit I have for a later production unit. I decided to file the slot a bit longer, which Bill agreed should work fine.
20-Jul-00 Note: Garrett, via email, says that the 1266 should fit without
modification, and that I might have a 1261 instead.
26-Jul-00 Note: Here's the news on this fitment problem:
From: "Reid/Garrett PerTronix" <prtx440@hotmail.com>For reference, my distributor No. is C3CF-2127-3EC ('63 Ford Falcon wagon with 170ci Six, no A/C, no PS, built in San Jose and sold in Calif.). Mine is probably the original distributor, but if you have a rebuilt distributor, you could have either style of the points plates installed, regardless of the distributor number.Judging by your pictures it appears that you have the 1266 kit. Although the 1266 kit fits into most of the distributors, some had different breaker plates, which created interference similar to what you have experienced. Originally the 1266 kit was developed for a group of distributors that had a specific breaker plate, and dropped in with out any modification. We have recently expanded the 1266 applications to include some of the distributors that were not able to utilize the kit previously. This was done by relocating the pilot pin on the base of the module to allow a larger air gap. The same results can be achieved by modifying the module chassis in the manner that you have. I understand that the distributors that could not fit the original 1266 kit with out modifications are few, but I would for you to try the most recent 1266 module and let me know if it fits with out modification. Please send me your shipping address, and I will rush a new module off to you.
Thanks again.
Sincerely
Garrett Weaver
PerTronix Tech
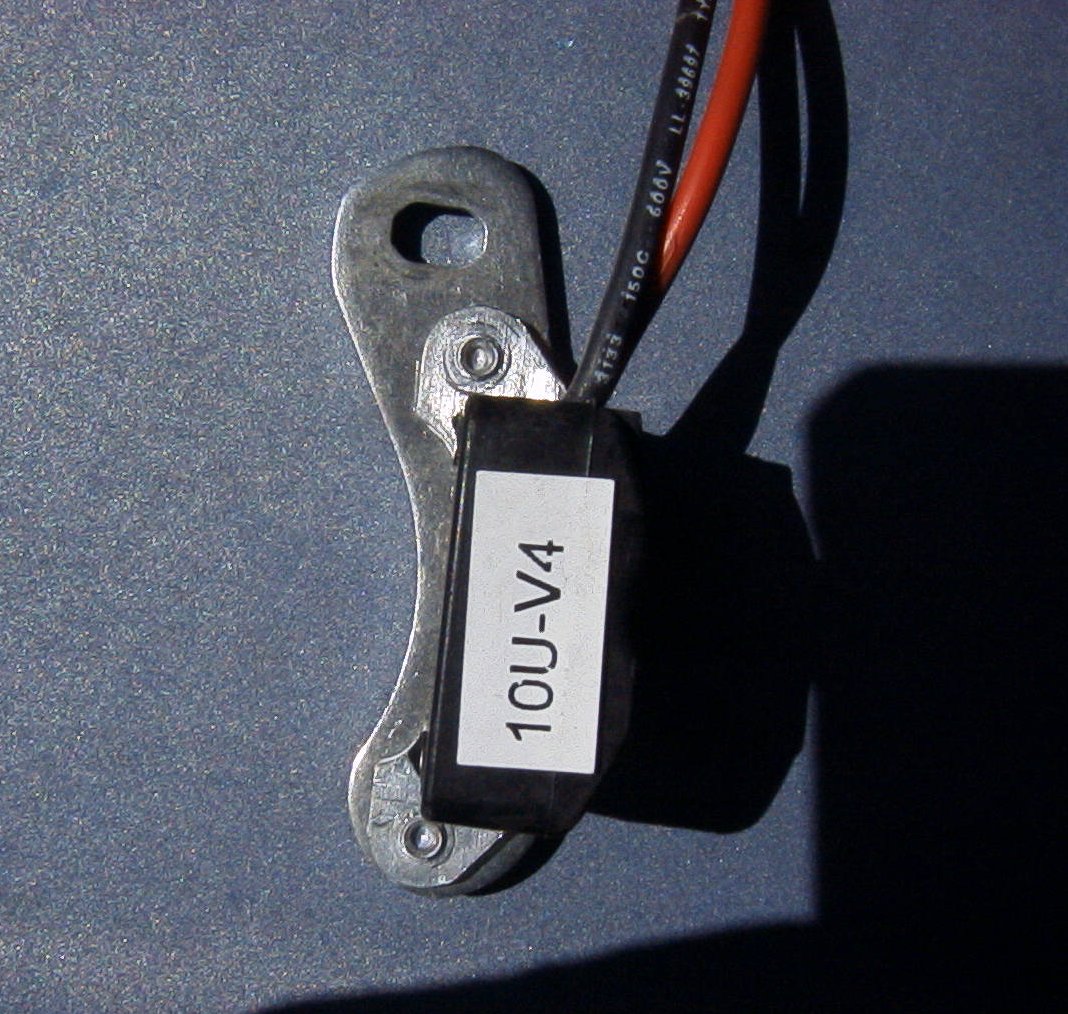
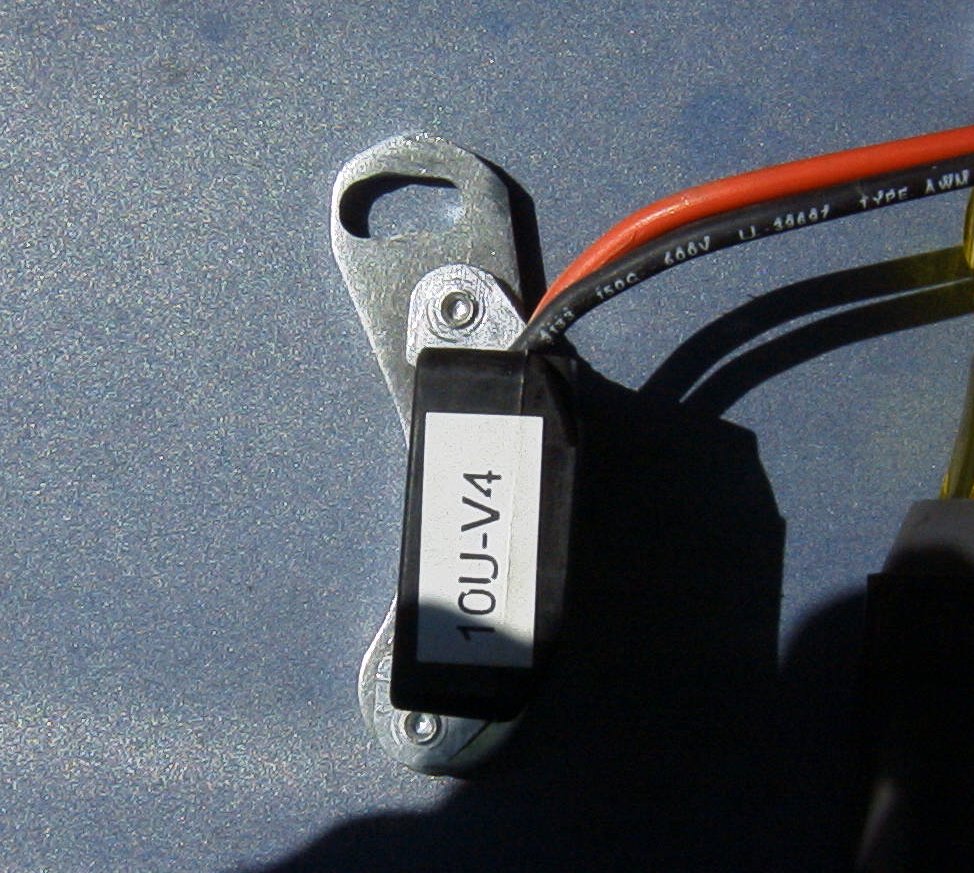
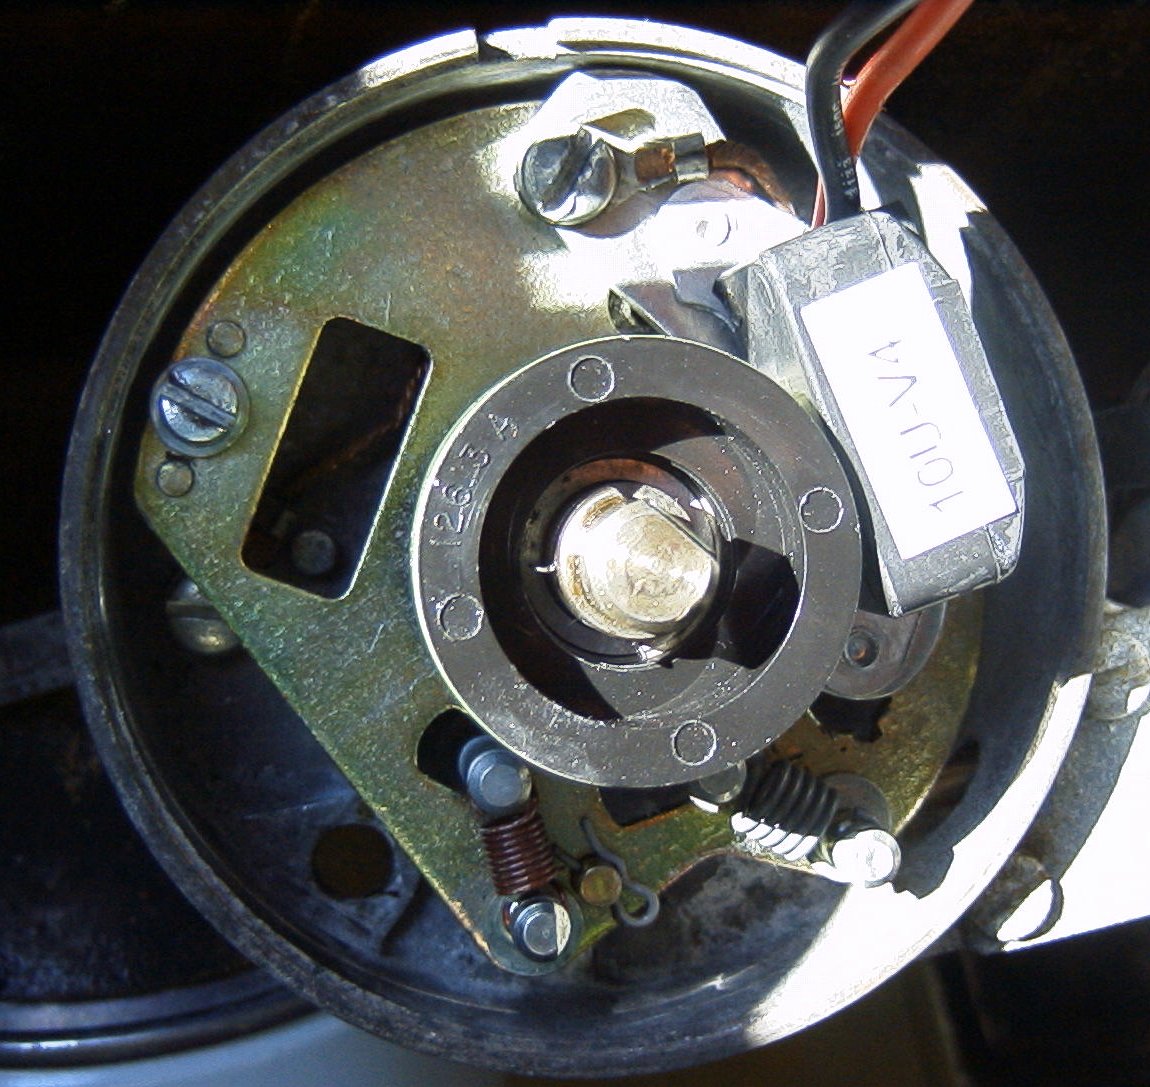
Early 1266 Ignitor Modification
When you adjust the Ignitor further "out" (toward the distributor housing), with the longer slot the opposite edge of the Ignitor base will now contact the distributor housing and will prevent proper operation of the vacuum advance, so remove some material as indicated below, using a flat (mill, bastard) file.
|
Before
|
After
|
|
Install the Ignitor, adjust for .030" air gap (green arrow).
Make sure the Ignitor mounting base does not contact the distributor housing
(blue arrow).
I was unable to obtain .030"; shown is about .010" gap. |
Result: I was able to acheive about .010" gap, and the car seemed to
run fine. However, I did not drive it extensively, and soon decided
to take up Garrett's offer; they sent me a newer-style 1266 kit (the box
was labelled, "12660", with
the trailing zero penned in by hand), which fit much better, without the
mods described above.
|
|
|
| Send mail to Al about this page. | Last updated 14-Mar-2001 |
Back to the the Falcon/Comet FAQ